Preserved Home: Make campouts a homey culinary treat
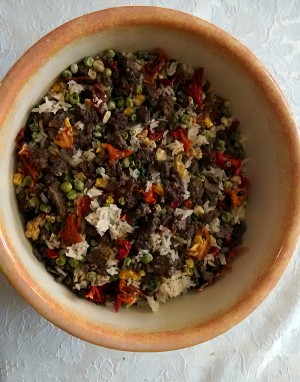
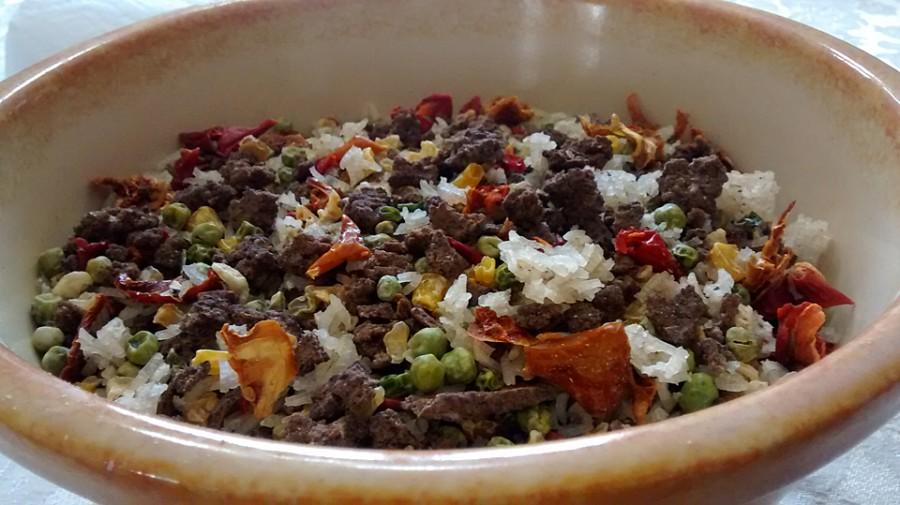
Survivor Stew, a recipe amended from the book “Recipes for Adventure,” allows you to pack a home-cooked meal for a campout. (Photo by Laura Woolfrey-Macklem)
May 23, 2015
 It’s been said the best part of camping is the memories. My family loves to camp, but the hassle that goes into getting everything there, and back, is frustrating. Remembering everything from dish soap to salt and pepper is tedious. My husband did make a camp kitchen, which is a box on legs, storing silverware, camp stove, cutting board and the like. It folds down on both sides for food preparation. That’s helped a lot in regard to efficiency in cooking supplies. But then there’s food.
Determined to simplify packing for camp cooking, I looked to my dehydrated food storage. I’ve been playing around with dehydrating potatoes, rice, pasta and quinoa. You might wonder why you should cook a dry product (such as rice), cook it, then dry it out again. Dehydrated grains and starches rehydrate at a similar rate of dehydrated meats and vegetables, making camp meals a cinch.
You also might wonder why I wouldn’t just purchase instant rice and potatoes. I find instant rice and potatoes inedible, and home-dehydrated rice and potatoes mimic freshly cooked perfectly. In addition, it’s much more cost effective to make these instant ingredients at home.
After cooking up your quinoa, rice or pasta, you simply lay on dehydrating trays and dry at 135 degrees. If you want to add flavor up front to your rice or quinoa, cook in fat-free chicken, vegetable or beef broth.
Another way of dehydrating pasta is to simply dehydrate leftover spaghetti with red sauce, with or without ground meat. To rehydrate, I boil enough water to almost cover my ingredients, then let sit for five minutes off the heat. I return it to a boil. Add water as needed to bring the food to original state. You can’t tell the difference between freshly cooked spaghetti and sauce, and the rehydrated version. It’s like magic. You can also dehydrate leftover chili, and other meals.
These are great not just for camping but for emergency food storage. If I plan on keeping meals containing meat for longer than six months, I store them vacuum-packed in the freezer.
Dehydrating potatoes takes more work.
To make hash browns, shred potatoes and keep in cold water with lemon while processing all the potatoes. Bring water with lemon to a boil and cook for about 45 seconds. Plunge into cold water with lemon. Dehydrate from there.
I also make potato powder by mashing potatoes only with fat-free broth. I puree in the food processor and dry in a sheet. I pulverize the potatoes for storage. To rehydrate, take ½ cup water, ½ cup milk (which you can make from powdered milk), 2 tablespoons of butter (can use powdered butter) and ½ tsp. salt. Boil. Remove from heat and whisk in ⅓ cup plus 1 tsp. powdered potato. You now have instant mashed potatoes.
Dehydrated meats and beans for meals requires some knowledge. I’ve watched YouTube videos, read articles, posed questions on message boards, and most importantly I’ve done experiments.
For ground beef, I buy 91 percent lean and cook up with fresh garlic and minced onion. Then I drain the fat and blot dry with paper towels. Dehydrate until completely dry and store in a vacuum-sealed bag or jar. I like to keep mine in the freezer, but again, it’s not necessary if you intend to use this within six months. I do the same with sausage. I have seen countless YouTube videos instructing viewers to rinse the ground beef to rid the meat of fat. Please don’t ever rinse cooked ground beef. My mother did this in the ’70s — yuck. Using lean meat, draining, blotting with towels and storing properly works just fine.
I don’t recommend dehydrating chicken. I tried it with canned chicken and ground chicken, and it’s just tough. If you want to use chicken in dehydrated meals, freeze dried is the way to go. It’s expensive, but it’s a great product.
For some reason, stove-cooked beans don’t rehydrate well at all. Pressure-canned beans (store bought or home canned) do rehydrate nicely, however. Expect some of them to split.

Putting together meals with your dehydrated storage is great fun. I love opening up my jars of dehydrated peas, zucchini, carrots, tomatoes and other pretty put-ups to create a meal.
One of my family’s favorite camp dinners is “Survivor Stew.” That’s what my kids have dubbed a rice-based meal I amended from The Backpacking Chef’s book, “Recipes for Adventure.” I highly recommend his book, which teaches how to make everything from fruit leathers to potato barks for snacking and cooking. The author, Chef Glenn McAllister, includes hearty main dishes, breakfast and dessert recipes, and dehydration/cooking instructions. It’s a fun book every camper or food storage aficionado should own. As a bonus, McAllister has a Facebook page where you can ask questions, and you can also subscribe to his free email newsletter.
One of the book’s recipes is for a black bean salsa leather. Just puree a 15.5 ounce can of black beans with ½ cup of salsa and dehydrate. McAllister uses his barks in torn pieces, but I pulverize mine into a powder. Either way is fine. This black bean salsa leather transforms into a nice little sauce in the rice dish.
Survivor Stew
Recipe amended from “Recipes for Adventure”
2 cups dehydrated rice
2 cups dehydrated mixed vegetables (corn, onions, tomatoes, peas, bell peppers)
1 cup black bean and salsa bark
¾ cup dehydrated ground beef
½ teaspoon dehydrated garlic
Salt and pepper to taste
5 cups water
Combine all ingredients with water in a pot and soak for five minutes. Bring to a boil, and lower to simmer. Stir occasionally, adding water if necessary. Cook until desired “bite” has been achieved. We top this dish with shredded cheese and corn chips.
Laura Woolfrey-Macklem is a former North County resident who produces the Preserved Home blog. Visit www.preservedhome.com. Send questions and comments to columnists@northcoastcurrent.com.


